Showing posts with label Kinestiotape. Show all posts

Thursday, February 5, 2015

Chiropractic Care to Improve Proprioception

Amber Erickson, DC, MEEBW

Can you close your eyes and touch your nose?  Can you stand on one foot?  Balance is very important, but it is something that Ali skirt.jpgwe often take for granted.  This is the ability to maintain an upright posture without leaning.  Proprioception is knowing where your body joints are in space, without looking.  Your body depends on proprioception for everything that you do, from work to play.  This is the reason that you know where your foot is when you step without actually watching it step.  Joint receptors both in the foot, leg and back will send input in the motion back up into the brain to be processed.  Both can be improved and strengthened, with purposeful exercises and with chiropractic care.
The proprioceptive system is composed of nerves which are found in joints and in the muscles and ligaments that surround all joints.  The function of these nerves is to maintain tone and to sense when stretch is applied to the joint capsule.  They then transmit this information up to the brain where it is then processed, so that the body can then be instructed on how to respond.  The brain will then send nerve signals down to the appropriate muscles to either contract or relax the relevant muscles and to produce the dictated movement.  This happens at a very rapid speed, without conscious thought on our part.  This is in part how a reflex works, often the motion is often completed before we are even aware that we are moving.
Good balance is a direct result of a properly functioning proprioceptive system, and a joint injury or restriction can lessen the effectiveness of the entire system.  This may be from an acute injury, or from chronic stress and a repetitive injury. As we age, our balance tends to deteriorate.  This can lead to an easier chance of injury, and can make us more prone to re-injury of healed locations.20150204_162257.jpg
It is possible to increase the proprioceptive feedback from your body to your brain, and this can help an athlete to recover more quickly.  It is also possible to improve posture, and to increase our balance so our day to day activities cause less discomfort as we age.  The proprioceptive system can be trained and strengthened, both through specific exercises and with chiropractic care.  Chiropractors use neurological testing to monitor and test the proprioceptive system, and then to improve on any deficits noted.
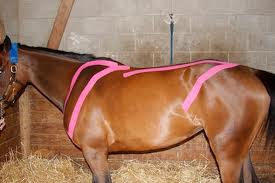
There are many exercises designed to improve balance and proprioception.  All balance exercises should be began on a flat, even surface.  Begin by standing on one leg, and holding your foot at the level of your ankle.  Hold this up for five to six seconds, and then repeat ten to twelve times.  Once you feel stable doing this exercise, proceed to doing calf raises and mini squats, as well as leg abduction (taking the leg away from the midline) and leg adduction.  Lunges are also a great way to strengthen the lower body.  Following this with use of a wobble board can then be very beneficial, but requires core strength and practice. All of these exercises can then be performed on the wobble board, as long as stability and balance can be maintained.  More advanced exercises include running a figure eight pattern, and walking while crossing over your feet.  Regular chiropractic care can also significantly help to improve both balance and proprioception to restoring joint motion and improving muscle tone.  Kinesiology taping can also be a great way to increase proprioception.


Wednesday, March 13, 2013

After an injury


I had a little incident last night.  Alice, my three year old daughter, woke me up a little after midnight.  She had to go downstairs, to the bathroom.  I was carrying her down our very steep, wooden steps, when I slipped.  Down the stairs I bounced, holding Ali.  I landed a little bit on her leg, and it scared her a lot, but she's mostly unharmed.  However I am bruised all over, and very sore!  Let's just say that it is difficult to sit on a hard chair right now...

So this brings me to my topic today, fighting inflammation after an injury.  I have been icing steady all morning.  Ice applied for ten to fifteen minutes every hour can help to decrease swelling.  I also had my husband put some kinesiology tape on me in a fan formation.  This will help to fight inflammation by increasing oxygenation to the muscles and tissue in the area.  I then used a liberal dose of biofreeze to block some of the pain.  Picture is fromwww.healthandcare.co.uk

Avoiding over the counter NSAID's or pain relivers (aka aspirin) will also help to decrease healing time significantly.  There has been some very interesting research published recently that shows some new information.  Not taking NSAIDS for pain will help to increase healing speed by as much as six weeks, after a major injury. 

So I will spend the day sitting on an ice pack and drinking a lot of water so I can heal as fast as possible.  I am convinced that spring will come back, eventually, so I need to be ready for it!


Tuesday, February 26, 2013

Kinesiology Taping for Riders

Kinesiology taping has been steadily gaining popularity with athletes in all types of competition.  Horse riders in particular are finding the effects of tape highly useful. 


Many of us horseback riders are "weekend warriers" with a 9-5 desk job during the week.  This means that our rider fitness level isn't the best it could be.  Therefore, we are more prone to injuries while riding, and many of us suffer from stiffness and muscle soreness after a long ride. 

Kinesiology taping can help to alleviate much of this soreness.  It also has many uses to prevent injury, and for decreasing healing time after an injury does happen.  Spring is coming, and many of us find ourselves hitting the ground more often than we would like riding excited horses who have had a long winter with little to no exercise. 

Kinesiology tape, if correctly applied, can help to decrease inflammation after an injury.  It can also help to support weak muscles while we begin our spring conditioning programs.  Bruising and swelling can be significantly decreased if tape is applied soon after an injury, but the tape can also be useful to prevent generalized stiffness.


For equestrians, I often find that patients complain of knee, hip and low back pain.  There are many specific taping patterns for each type of pain, and after the tape is applied the patient will wear it for three to five days. 


The type of tape applied, and the method of application used, will depend on actual symptoms. 
 
More to follow!

Monday, November 5, 2012

Core Strengthening for Your Horse, Part Three


Core Strengthening for Your Horse, Part Three

By: Amber Erickson, DC, MEBW

               We have been discussing core strengthening for your equine partner, and this month’s article will continue learning new stretches and exercises.   For a quick review, core strengthening can improve almost any horses performance, as well as lessening the chance of an injury happening.  Continue to have a safe place to work with your horse, and keep wearing protective footwear and gloves.  By now you and your horse should be getting pretty good at doing the five or six stretches we have already discussed, and you may already be noticing some differences in his topline muscling.  This month we will be focusing on true core strengthening.  Up until this point, we have done stretching and range of motion exercises created to strengthen and to stretch the horse’s upper back and abdominal muscles.  As with all core strengthening exercises, these are best done when the horse is warm (a five or ten minute walking session is usually sufficient to warm him up).  Do these exercises three to six times every day, four or five times per week. 
                The newest stretch is called a wither lift.  The handler should stand by the horse’s front leg, facing toward the horse.  Using both hands, as spread apart as you can make your fingers, apply gentle but firm upward pressure onto the horse’s sternum (or chest).  Your hands should be just in front of the location of the girth, near the pectoral muscles.    The horse will respond by lifting his withers toward the ceiling.  Continue working back on his belly into a belly lift, and transition this into a back lift.  The horse should smoothly raise his entire back, from his withers through his low back, in response to your gentle pressure. 

                It is possible to increase this stretch by asking a handler to lower the horse’s head a small amount while he’s stretching.  If your horse is less than sensitive, and he does not respond to your hands (if your hands lack the strength to hold his move), you can use a pen cap or hoof pick to gently ask your horse to lift his back.  It is common for many horses to resist doing a belly lift when this exercise is first introduced.  He should become accustomed to it as he gets stronger with daily exercises.  However, if his resistance continues past the first week, or becomes more aggressive, please desist doing those exercises.    Consult with your veterinarian or equine chiropractor before re-introducing them.  This holds true for all of the exercises we have discussed.  If the horse displays a marked change in range of motion or in acceptance of a stretch day by day, he may need to be checked out by an equine Bodyworker or chiropractor. 
These six or seven exercises can help you to re-shape your horses back in ways you never thought possible.  Once you have performed these daily for several months, the horse is ready to move onto cavalletti and more advanced under saddle work to continue building and stretching his topline and abdominal muscling. 
Dr. Amber Erickson is a Doctor of Chiropractic at Erickson Family Chiropractic in Richfield, WI. She is also a Master Equine Bodyworker, certified by Equinology.  More information can be found at www.elementalequineservices.webs.com.  

Wednesday, October 31, 2012

Core Strengthening for Your Horse, Part Two


Core Strengthening for Your Horse, Part Two
By: Amber Erickson, DC, MEBW
                Last month we began discussing core strengthening for your equine partner, and this month’s article will continue along that theme.   For a quick review, core strengthening can improve almost any horses performance, as well as lessening the chance of an injury happening.  Just like last month, ensure that you have a safe place to work with your horse and that you have protective footwear and gloves.  Continue doing the downward stretches that we began last month, but most horses will be ready to stretch a little more by now.  This month we will be focusing on laterally bending the horse, throughout his neck and back.


                To begin the next stretch, square the horse up along a wall and stand at his shoulder.  You will be facing out, with your back to your horses shoulder.  Gently guide the horses head around your body using his halter, towards his hip. 
You may need a treat to lure him around you the first few times.  Ask him to slowly bend around you, keep the head as vertical as possible.  When he has stretched has far as he is able, ask him gently to hold that stretch for a few seconds.  Your right hand can gently support his neck, but do not let him twist completely from the poll.  His entire neck should be stretching out fluidly, with no abrupt angles in the neck.   Once your horse is bending around you well, ask him to stretch his nose out a little further to get a treat a little further away.  Also ask him to hold the stretch a little longer, each day.

                The next stretch, continue to place the horse along a wall with his feet squared up.  Then stand near his hip, a few feet out from him, facing towards his head.   Proceed to offer your horse a treat or a carrot, but hold the treat back by his hip.  When he begins to follow the treat, slowly lower his head down towards his hind hoof.  Ask him to slowly and smoothly stretch his head as far back and down as he can comfortably go.
                The final stretch this month is full neck extension.  Use this stretch when you have finished all of the previously discussed exercises for the maximum benefit.  This stretch may be more easily performed over a stall door or guard at the height of his neck to avoid him stepping forward.  Without a stall, have a helper apply gentle pressure with a hand on the horse’s chest to avoid a step forward.  Use a treat or a carrot to ask the horse to stretch his neck forward as far as he can comfortably reach.  His head should always stay below his withers, long and low is the best way to do this stretch. 
                Always give the horse his or her treat when the head is in the neutral position.  This will help to avoid bitten fingers!  Some more food aggressive horses may need to learn to wait until the entire stretching program is concluded before they are fed their treats in a bucket.  Use your best judgment to keep your fingers safe. 
                Performing these exercises four or five days a week, doing three or four repetitions per side, per day, has been shown to increase a horse’s back joint range of motion.  These exercises can also help to level out uneven muscling or even to help begin to rebuild atrophied back muscling.  Keep up the good work stretching; there will be more to come next month.

                Dr. Amber Erickson is a Doctor of Chiropractic at Erickson Family Chiropractic in Richfield, WI. She is also a Master Equine Bodyworker, certified by Equinology.  More information can be found at www.elementalequineservices.webs.com. 


Tuesday, October 2, 2012

Core Strengthening for Your Horse, Part One
 
By: Amber Erickson, DC, MEBW
 
Core (or abdominal) strengthening is a popular topic with human fitness experts, but not many people think about how it can be applied to a horse. Core stabilization training simply refers to a series of exercises performed in a systematic way daily that are designed to strengthen and to stretch the upper back and abdominal muscles. These exercises are designed to increase motion in the horse’s intervertebral joints (the back and neck), as well as strengthening the many postural and work muscles along the horse’s neck, back, abdomen and pelvic region. These muscles provide the stability necessary for an athlete to use his or her body to the best of their ability, and strengthening the core muscles will often improve performance while also helping to prevent injuries from occurring. This is the first part of a three part series of articles on how to strength the core muscles in your horse.

To begin, please be sure that you have a safe place to work with your horse. This can be anywhere with good footing, from the barn aisle to the pasture. A halter and a lead rope is all that is required on your horse, but you should always wear protective footwear and gloves for your safety. Keep the stall open at all times to ensure a quick escape, or avoid the stall all together and work in an arena or barn aisle. You will need carrot slices, or smallish horse cookies to provide the “bait” while the horse is learning how to stretch and bend on command. Ensure that your posture is as well maintained as possible to avoid injuring your own back.

Core strengthening exercises should be avoided if your horse has trouble balancing on three legs, or extreme trouble bending. Please discuss any exercise program with your veterinarian if your horse has suffered from any neurological diseases, or from a severe injury. Also contact your veterinarian if you notice that your horse is having continued trouble balancing while you perform these exercises. The horse should be standing square and balanced on all four legs as often as possible. Position your horse near a wall to start, as this teaches him to maintain the stretch without moving.

The first stretch to teach your horse will be to touch his toes. Keep your horse’s head absolutely straight, and ask him to lower his head to the ground between his front feet. This can easily be done by offering him a piece of carrot or a treat, and slowly lowering the treat down. However, do not give him the treat while his head is down. This will only encourage the horse to nip and to grab the carrot out of your hands, which can be dangerous for fingers! Horses can be taught to calmly and quietly stretch their head down to their feet, and will even be able to reach far between their front feet with time and practice. This stretch is easily taught with the use of treats, and by gentle downward pressure on the lead rope to show him what is expected of him. Feel free to grab the noseband of the halter if he deviates his head at all, he should be 100% straight the entire exercise. Also, do not ask for a bend above the knees. The horse’s head should ALWAYS be below his knees, to avoid unnecessary pressure on the joints found at the base of the neck.
 
The horse should be verbally encouraged to maintain this stretch for a few seconds, then when he is released and back to neutral he may have his treat. This helps him to learn to slowly stretch and hold, and that his reward will be given once he is finished stretching. Do not allow the horse to move his feet unless he must to maintain his balance, as this will enable him to “cheat” the stretch.


The next stretch begins the same, but then has him laterally deviate to touch the sides of his feet. Most horses will follow the treat, and it helps to tap him on the outside of his cornet band to show him exactly where you want his nose to be. Perform both of these exercises daily three to five times, with three to five repetitions at each time. More stretches will be discussed next time.

Friday, May 18, 2012

An Introduction to Kinesiotape

In recent years, there seems to be many professional athletes sporting brightly colored tape on various parts of their body, in all configurations.  This method of using tape to treat almost any condition seems to be exploding in popularity.  However, does it have uses for those of us, shall we say, less athletic regular people?  Yes!!  Kinesio tape has been used to treat anything from low back pain to carpal tunnel syndrome to digestion upsets in patients of all ages and sizes.

As stated in the Kinesio Taping Association International KT1 Kinesio taping method book, “Kinesio Tex Tape was first developed and utilized by Dr. Kenzo Kase.”  The tape is a cotton and elastic tape that is designed to mimic the inherent properties of human skin.  The tape is applied to an area of the body in a very specific way, and then is left on the patient for three to six days for maximum therapeutic benefit.  Most people do not notice that the tape is even there anymore after a few minutes of wearing it, and can go about their regular activities (including bathing and swimming).  The tape is latex free, using natural plant dyes to color it.
Patients often complain of the chiropractic adjustment “not holding” as long as they would like, especially in the early stages of care or after an acute injury to the area.  Kinesio tape is a great way to continue stimulating the proprioceptors in that particular area between adjustments, as this method of care can provide effective neuromuscular retraining and overall support for the area.  There are also many advanced taping techniques for care of an acute injury, or to stimulate lymphatic’s, or for chronic conditions that need additional support.  The compressive forces of the tape also help to reduce inflammation, in some cases.
The tape comes in four colors.  The colors do not change the treatment in any way!  However, the pink tape is thought to draw energy, so it is mostly used to “turn on” or facilitate a muscles that needs to be strengthened.  The blue tape is meant to be cooling, so this is used for acute, inflamed tissues that need to be calmed down and relaxed.  The black tape is warming, so this is great for any chronic condition or for athletes using it to enhance their performance.  Finally the beige or neutral tape is best for those people who don’t want to have tape on their bodies in bright colors!  The neutral colored tape is especially great for anywhere very noticeable on the body, or for someone who works in an office with a strict dress code.  All four types of tape are identically made, with only the color of dye being a different factor.  They are all hypoallergenic as well.
Kinesiotape has been successfully used to treat many conditions, ranging from shoulder pain to headaches to low back pain and plantar fasciitis.  It has also been used very successfully on very small children and on animals.  If you are interested in how Kinesiotape can be added to your chiropractic care plan, please do not hesitate to ask us.

When I next have time, I will expand on using Kinesiotape on horses, as well as rider-specific uses.  Have a fantastic weekend everyone!